Nourish Cafe + Market – Columbia, MO

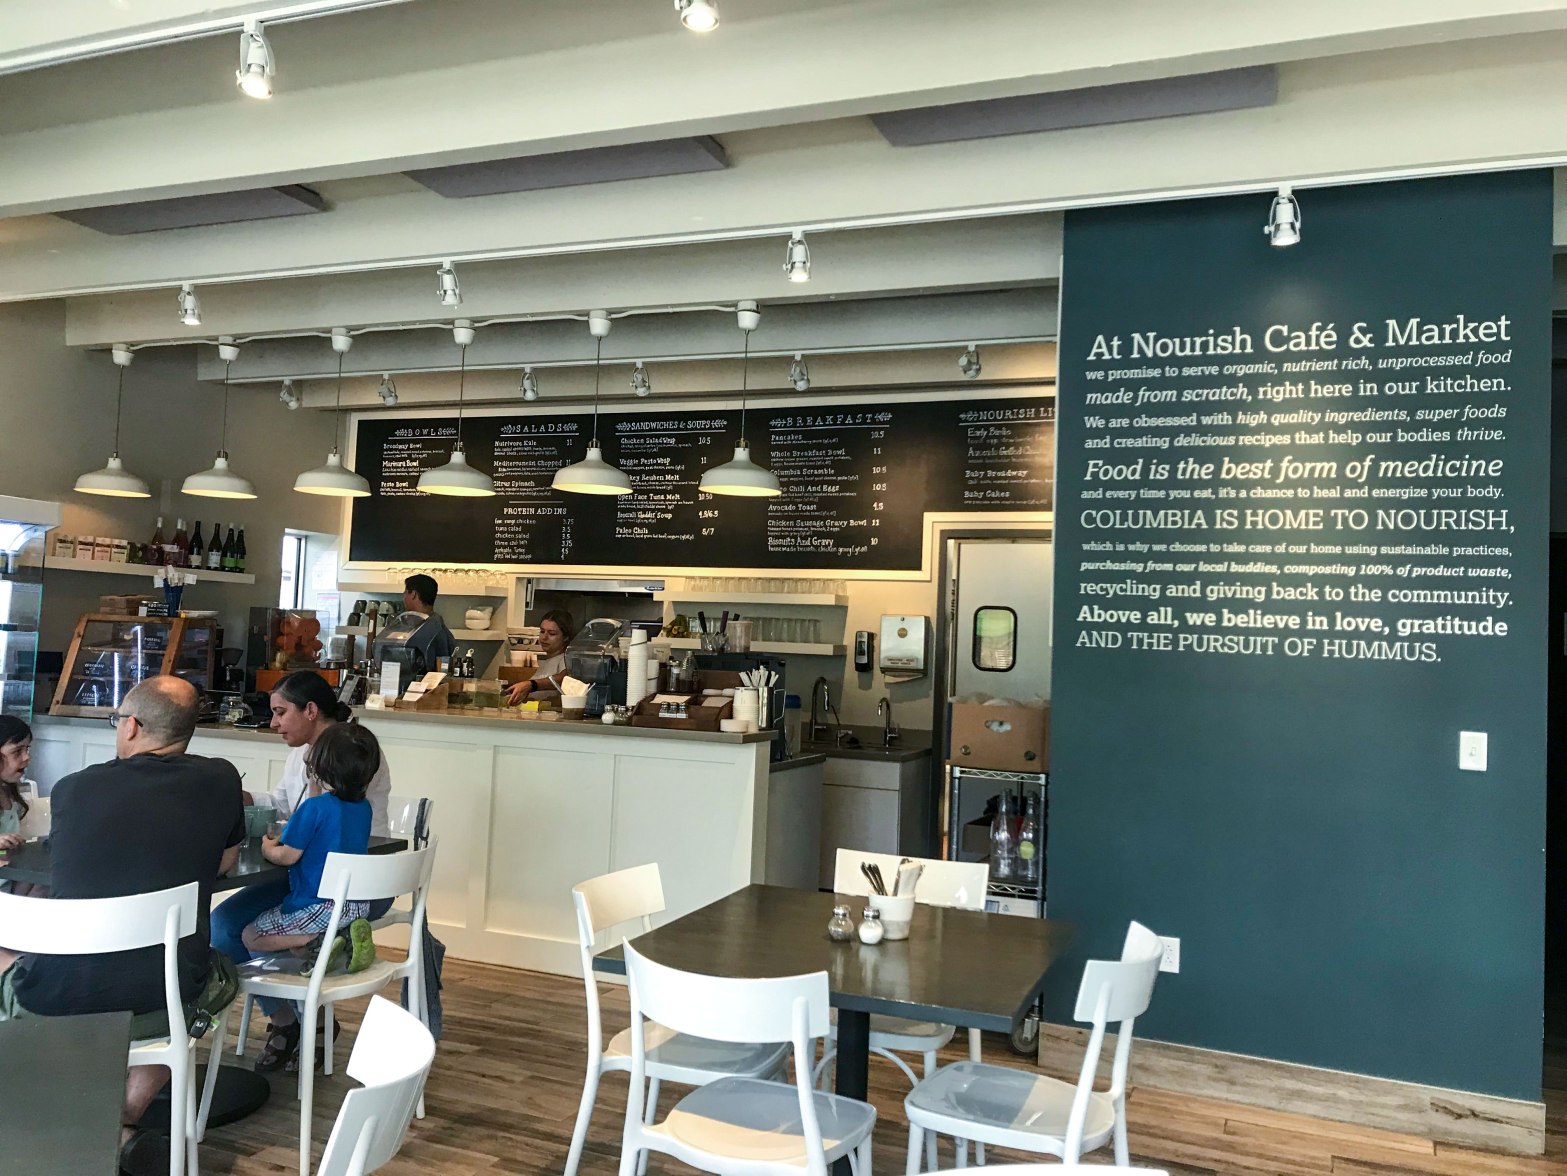
Nourish is one of those places that really tries to tackle it all. Everything is gluten-free, soy, corn, refined sugar free and almost everything is made with organic ingredients and sourced locally (as you can see from their website).

The downside of super duper organic everything-free places is that you often end up sacrificing taste or texture and paying more for the pleasure. This is partially true for Nourish. (I mean $10 for a berry bowl?) But they do have some yummy stuff and it’s always nice to have a 100% GF menu.

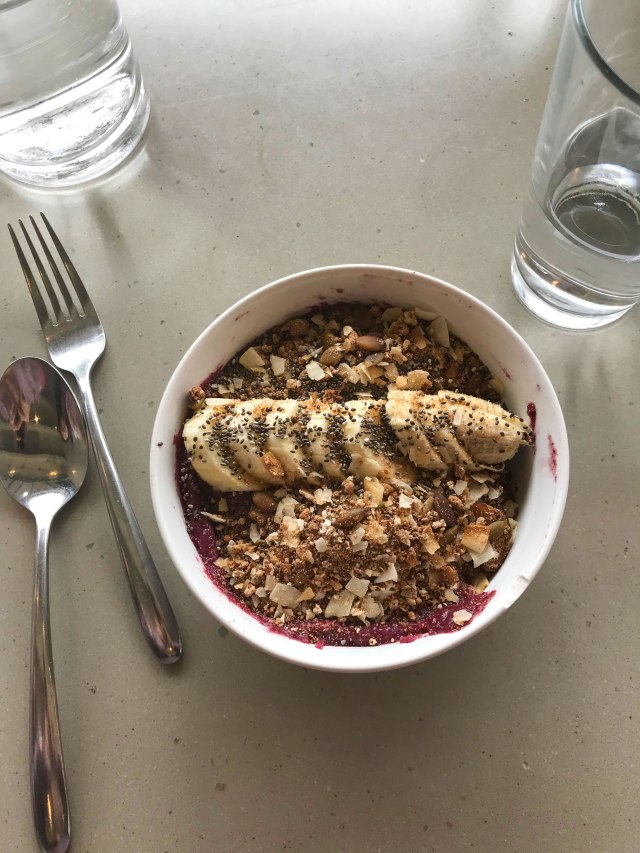
My sister (also GF) and I got several items to try a wide variety of things. We started with the Acai Berry Bowl. It is essentially just a smoothie topped with various granola and nuts and a big sliced banana. Pretty yummy!

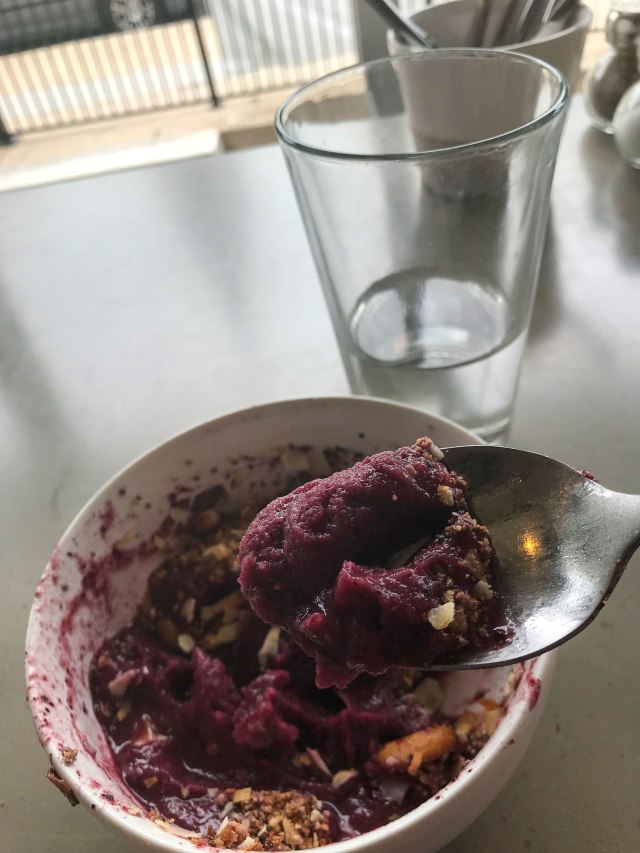
The smoothie is a great thickness that lets you compose the perfect bite without having to slurp it because it gets too watery. Not sure if it was worth $10 when I make something very similar for breakfast with frozen fruit and protein granola, but still tasty.

Our next item was the GF pancakes. Usually, we would order the full Pancakes with Strawberry Sauce for $10.50, but, because we were already getting so much food, we opted for the Baby Cakes (a misleading name because it is only one pancake). We did ask them if we could add the strawberry sauce since the Baby Cakes only comes with regular maple syrup. 

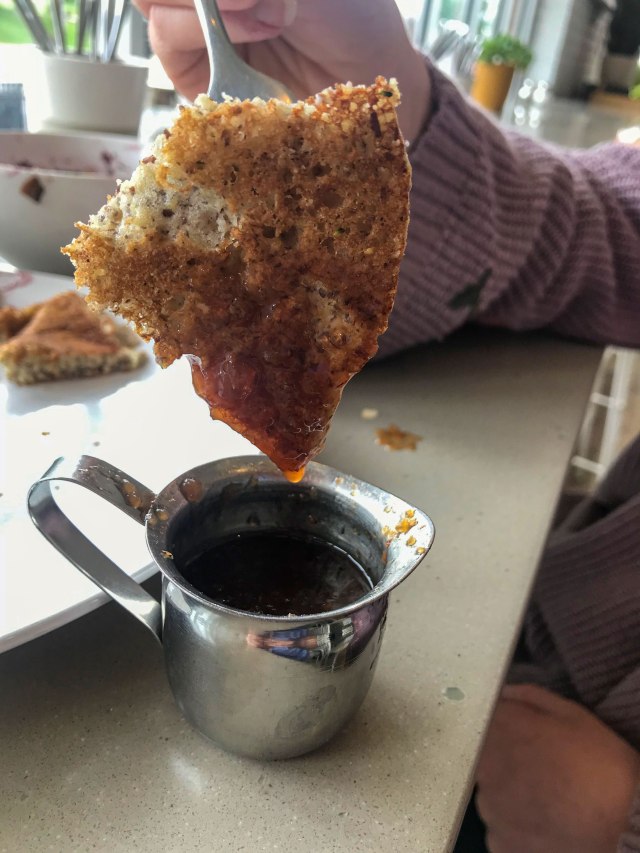
This dish is really good. The pancake itself is sizable and pretty fluffy. The strawberry sauce is so delicious. Because they’re all about organic, it has none of the bright red dye or whole plastic looking strawberries you usually find with strawberry syrup. (Not that I’m against that kind of syrup because it can be yummy, but that is not what you’re getting here.) This is a super natural and very tasty sauce. My sister and I like to dip our pancake pieces like in this photo. This is definitely a more economical option at $4.50.

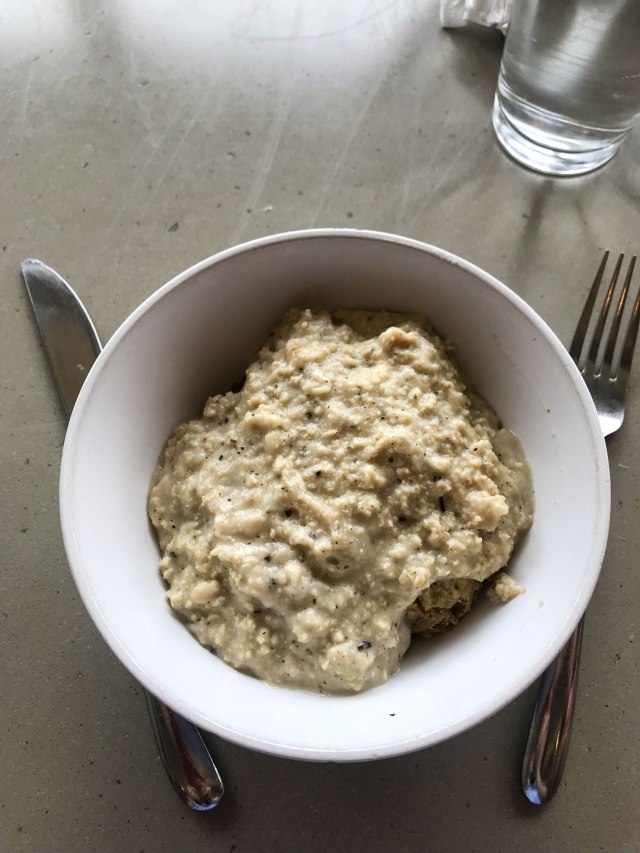
Our last item is a new addition to the menu, the Biscuits and Gravy. I had no idea what to expect, but a bowl full of what looked like porridge was not it. It smelled good (like chicken because the gravy is chicken based), but I couldn’t see the biscuits from under all the gravy. Part of me wondered if they were trying to hide how ugly their biscuits were by smothering them.

When I did locate a biscuit under all the gravy, it had a pretty chewy texture. Certainly not the best biscuits I’ve ever had (I’ll link my favorite biscuit recipe soon!), but not terrible. You could tell from the texture how organic the restaurant was trying to be (i.e. it was kind of tough and not very bread like). Something in the bite was okay, but very salty (this coming from a girl who LOVES her salt) and I couldn’t tell if it was the gravy or the biscuit. There was indeed way too much gravy. After I finished the biscuits there was still almost a whole bowl of gravy left. Overall, I probably won’t order it again, but I’m glad I tried it once.

TL;DR Nourish is a good place to visit if you’re looking for super organic and most allergens-free, but only if you’re willing to spend a little cash for a some typically disappointing gluten free textured food. Their pancakes and strawberry sauce though are very good!

Red, White & Blue Cake Pops

This is a recipe I created by smashing together a bunch of other recipes (linked at the bottom) and my vision of this marbled 4th of July cake pop. I wanted something super festive for the 4th and, after making these last year, I was ready to tackle another challenge.

You know I’ve got a recipe first policy so here it is. It’s a long one!

CAKE:

  • 2 cups gluten free flour
  • 1/4 cup + 2 tablespoons cornstarch
  • 2 teaspoons baking powder
  • 1/2 teaspoon baking soda
  • 1/2 teaspoon salt
  • 12 tablespoons butter, at room temperature
  • 1 1/2 cups granulated sugar
  • 1 tablespoon clear vanilla flavoring 
  • 6 egg whites at room temperature (or egg white from a carton)
  • 1 1/3 cups buttermilk, at room temperature

FROSTING:

  • 7 Tablespoons butter, softened to room temperature
  • 1 and 3/4 cups confectioners’ sugar
  • 2–3 teaspoons heavy cream or milk
  • 1 teaspoon vanilla extract

DECORATION:

  • 20+ oz Vanilla CandiQuik (You might need more depending on how much you want to coat the pops)
  • Red and Blue Pop Rocks
  • Lollipop Sticks or Cake Pop Sticks

1. Preheat oven to 350°F. Grease 3 6-inch round cake pans (or 3 small pans of equal size. I used rectangular disposable pans) and line the bottom of each with parchment paper. Set the pans aside. 

2. Into a medium-size bowl, sift (I don’t usually sift but the recipe I based this on was VERY insistent you sift so I did it for this one) the flour, cornstarch, baking powder, and baking soda. Add the salt and whisk to combine well. Set the dry ingredients aside.

3. In the bowl of a stand mixer fitted with the paddle attachment or a large bowl with a handheld mixer, beat the butter until it’s pale in color. Add the sugar, vanilla flavoring and egg whites, and beat on medium-high speed for about a minute or until light and fluffy, stopping at least once to scrape the entire mixture off the sides and bottom of the bowl. 

4. To the large bowl with the butter and sugar mixture, add the dry ingredients in 3 equal portions, alternating with the buttermilk in 2 parts, beginning and ending with the dry ingredients and mixing to combine in between additions. Once all of the ingredients have been added, beat with the mixer until mostly combined, then turn over the batter a few times by hand with a spatula. It should be very thickly pourable and relatively smooth.

5. Divide the batter evenly between three bowls. Add red to one, blue to the other and leave one white.

6. Pour each into one of the prepared baking pans and smooth each into an even layer with an offset spatula. Smack each pan flat on the counter a few times to break up any large pockets of air. Place the baking pans in the center of the preheated oven and bake for 20 minutes. Rotate the pans, and continue to bake until the cakes are lightly golden brown all over, have begun to pull away from the sides of the pan (about another 10 minutes). Let them cool completely.

7. Make the frosting:With a handheld or stand mixer fitted with a paddle attachment, beat the butter on medium speed until creamy, about 2 minutes. Add confectioners’ sugar, heavy cream, and vanilla extract with the mixer running on low. Increase to high speed and beat for 3 full minutes.

8. Crumble each cake into its own bowl. Fill a 1/3 cup with frosting and add part to the cake. Mix with hands. Add up to the full 1/3 cup frosting to each color as needed.

9. Refrigerate bowl of batter for 30 min to overnight.

10. Take a small portion from each color and roll together into a ball. Place on cookie sheet with wax paper. You can refrigerate again while heating chocolate.

11. Melt chocolate coating per package directions.

12. Dip the tip of your Cake Pop Sticks in melted coating before inserting it into a cake ball. Return cake pops to the wax paper, cover with cling wrap and place in freezer for at least an hour to firm up. 

13. Once firm, remove one cake pop one at a time and cover with candy coating. Softly tap and rotate until excess chocolate drips off. Sprinkle the ball with Pop Rocks or roll them in the Pop Rocks for more coverage.

14. Place upright into a Styrofoam block or box with holes poked in it or place pop down on a wax paper covered cookie sheet. Repeat with remaining cake balls, only working with some out of the refrigerator at a time. 

15. Coating will set within an hour. Store cake pops in the refrigerator for up to 1 week or freeze.

MY TAKEAWAYS:

Overall, I would consider this recipe a success! It looked mostly the way I had envisioned and I was really pleased with my ability to Frankenstein all of these recipes together. Plus my family loved them!

I only have a few complaints:

My melted chocolate chip dipped attempt! Delicious, but not as festive.
  1. The cake was super moist. Which is great for a GF cake (because they’re often dry), but not great for crumbling. It might have been partially because I tried to cool it in the fridge to save time.
  2. This recipe takes a long time. Apparently, cake pops always take a while. One way to combat this is to spread the project over a couple of days! Make the batter one day and roll and dip the next or split it up any way you’d like.
  3. The Pop Rocks didn’t really pop. Because the pop rocks react to moisture and you’re adding them to a moist chocolate, they kind of lose their pop after application. You can try eating them really quickly or if you have any other suggestions let me know!
  4. The CandiQuick is bland. While it worked great for a quick dry coating and had a good white color, the CandiQuick doesn’t have much of a taste. That, paired with the white cake made for not a ton of flavor for a gal who wants a lot of flavor in her GF treats. My suggestion would be to try adding some clear flavoring to the cake to give it an extra oomph! Or maybe to the CandiQuick, but be careful of making it too watery.

But, despite these, I would consider this recipe a triumph.

Here is where I got my frosting recipe.

Here is a list of tips.

Here is my white cake recipe.

I know this recipe is long, but, if anyone does end up making it and has any suggestions or new discoveries, please let me know!

Steel City Pops – A Surprise Find! – Austin, TX

The best thing in the world is stumbling unexpectedly upon a great gluten free find. It’s like a little gift just for you!

I was driving through Austin on my way to a friend’s event and was craving ice cream (which I often am as you’ll quickly find if you frequent this blog). As I turned a corner, I passed this shop called Steel City Pops. I had never heard of it, but from the pictures on the sign I could tell it was a popsicle shop. It looked a little like one of those hipster places that probably charges to much for one “artisan” popsicle, but it was popsicles so I had to investigate.

A quick Google once I parked confirmed that they were indeed a little pricier, but I was already ready to give it a try. And then I clicked on the nutrition information and- GLUTEN FREE. Everything in this entire place is gluten free!

Steel City Pops serves 4 types of popsicles: Fruit, Creamy, Cookie and Paleo. You’d expect the Fruit (water based pops) and Creamy (milk based pops) to be GF, but imagine my surprise when I click the details of the Chocolate Brownie pop and see “gluten-free brownie” in the ingredients. I scrolled through the toppings and just kept seeing gluten free after gluten free. So now I HAD to go.

The aesthetic of the shop does have a sweet hipster vibe. The process is essentially this:

  1. Choose a popsicle from the groups above. They have so many options all GF! Including 5 Cookie pops with gluten free cookies! I chose a GF chocolate brownie. Fruit and Creamy are $3.59, Paleo is $3.99, Cookie is $4.59.
  2. Then you can either pay for that pop and go OR you can add toppings! It’s a flat rate for all 4 topping options. You can chose any combination of the following.
  3. First, you can get the pop Dipped. This is several choices of chocolate dips from white to dark. I went with a nice dark chocolate.
  4. Second, you can get it Dredged. This is a bunch of choices of various crumbly things they stick on top of the pop. Two of which are GF cookie crumbs! I opted for the GF graham cracker.
  5. Third, you can get Drizzle which is a bunch of sauces. I chose raspberry.
  6. Last, you can get a Dust which is essentially just an extra sprinkle of flavor.

And all of this is for the same price so you can really load up! My final popsicle was incredible. The cookie and ice cream combo was so delicious and not something you can often find outside of homemade with GF.

They serve it to you in a little cardboard bowl to make it less messy.

You definitely don’t need more than one per person because this was more than enough for me.

They also have all kinds of suggested combos to achieve flavors like Caramel Peanut Butter Cup and S’mores and White Chocolate Wedding Cake.

TL;DR – This popsicle shop was a great chance find and truly a highlight of my night. I’m always willing to spend a little extra money to try a new gluten free find, but this was so worth it. Delicious and fun with tons of options because everything is Gluten Free! I’ll definitely be back.

Gluten Free Oatmeal Chocolate Chip Cookie

First, the recipe:

Prep Time: 15 minutes Cook Time: 12 ish min Makes: 42 (ish)

  • 1 cup butter, softened
  • 1 cup packed brown sugar
  • 1/2 cup white sugar
  • 2 eggs
  • 2 teaspoons vanilla extract
  • 1 1/4 cups 1 to 1 GF flour (I use Bob’s Red Mill or Domata)
  • 1/2 teaspoon baking soda
  • 1 teaspoon salt
  • 3 cups quick-cooking oats (Your favorite GF oat)
  • 1 cup semisweet chocolate chips
  1. Preheat the oven to 325 degrees F (165 degrees C).
  2. In a large bowl, cream together the butter, brown sugar, and white sugar until smooth. Beat in eggs one at a time, then vanilla. Combine the flour, baking soda, and salt in separate bowl; stir into the creamed mixture until just blended. Mix in the quick oats, and chocolate chips. Drop by spoonfuls (or whatever size you want) onto parchment paper covered baking sheets.
  3. Bake for 12 minutes in the preheated oven. (I usually have to bake them for about 3-5 more minutes but I’m not sure if that’s because of the GF or my oven.) Look for them to be browned at the edges but not all the way through. They will harden more after being taken out of the oven.

Note: This recipe makes a lot of cookies so I usually do a half batch

There is nothing I hate more than opening a recipe on Pinterest only to be linked to a blog where I have to scroll through a million years of personal backstory before I finally get to the instructions. So I’m going to front load all of that for you.

This is definitely a recipe triumph but mostly because I’ve made it before. When I first made these cookies (found here on Allrecipes), I made them gluten-full. They were a gift for a friend and I didn’t wasn’t going to eat any so I figured I’d save a little money with the gluten-full flour. But they looked so delicious I *had* to give them a gluten free try. And it was super easy!

These cookies are a recipe I return to over and over again. The ingredients are simple and, because I almost always keep chocolate chips on hand, I can whip them up without a trip to the store.

Since this is a frequently made, fairly simple recipe, I didn’t document the process as much. But here are some behind the scenes tips and tricks:

I usually use a hand mixer up until after the mixing in of the dry ingredients.

Then I’ll use a big ol spatula to mix the chunky ingredients in. The original recipe calls for walnuts but I like to leave that out in favor of a few extra sprinkles of chocolate chips.

You’re going to want to give them some space because these cookies like to spread. Though even if they end up sticking together they’re pretty easy to separate after the oven.

The biggest trick is knowing when they’re done. I find the cooking time isn’t super reliable so I have to set consecutive 1-3 minute timers and just keep an eye on them. I also find that on the softer side is better because, as they cool, the cookies tend to get crisper anyway.

And there you have it! One of my favorite go to recipes and my first Recipe Triumphs and Tragedies post.

Gluten Free Pizza – Figaro’s Pizza & Pub – San Marcos, TX

One thing that perpetually frustrates me is you can never know what a gluten free crust is going to look like until you order it. Even a thorough Google search of the restaurant and the words “gluten free pizza” won’t do you any good. It’s like they’ve got something to hide…

This brings me to today’s Restaurant Breakdown of Figaro’s Pizza and Pub in San Marcos, TX. I’d been hearing for a while that they had a gluten free crust and today in that prime hunger time that is too late for lunch and too early for dinner I decided to give it a try. 

Visiting their online menu, I was pleased to see they did indeed have a gluten free crust. I was a little less pleased to see that it was a $3 upcharge. Gluten free is only available in the medium size (12”) pizza which is a minimum of $12 to start (plus $3 for the GF). 

When I picked up in store, I saw one of their gluten full personal sized pizza. That crust was thick and fluffy so this certainly wasn’t a thin crust establishment. 

The gluten free pizza, however, was disappointing. I will preface this overview with the fact that I am not a thin crust kind of gal. I like a good thick, bready crust on my pizza. I will also say that there is a difference between a crunchy cracker crust and just a crust that refuses to rise no matter how much the chef yells at it. 

This Figaro’s crust, unfortunately, fell into the latter category. While it was not the straight cardboard taste and texture that seems to plague many gluten free crusts, it was thin, flexible and mostly bland. 

As for the other ingredients, I will applaud Figaro’s for their use of cheese. A lot of pizzas go sauce heavy and cheese light. This one went heavy on both. It was a little too much sauce for me, but I have to say the amount of cheese was excellent. Plus they use 100% real cheese! (see box at the bottom)

TL;DR I am grateful to Figaro’s for trying their hand at a GF crust, but, especially being the only GF thing on the menu with a $3 “GF tax”, the thin and bland crust left much to be desired.

One thing I will add about Figaro’s that I think is great is that that, with every purchase, they donate to a charity that benefits local schools.

Pleased to Meet Me

Hello world! And whatever extraterrestrials might be out there reading this. I’ve been thinking about starting this blog for a while and today the thin, bland crust of yet another gluten free pizza pushed me over the edge. 

A few facts about me to get you started:

  • I have Celiac disease – this means no gluten (wheat, barley, rye, some oats) for me! (hence the blog title)
  • I’m currently living near Austin, TX so that’s where you’ll see most of my posts are centered, but I do love to travel and plan to take my gluten free gut with me
  • I’m an avid baker with one heck of a sweet tooth and a love of bread

What to expect from me? I plan to post largely three things:

  • Restaurant Breakdown – A breakdown of the gluten free items I try, the staff’s knowledgeability about gluten free and the array of gluten free options (calling yourself “gluten free friendly” and then having crouton-less salads as your only gluten free menu item doesn’t count)
  • Recipe Triumphs and Tragedies – I cook and bake a lot. Most of my baking consists of converting gluten-full recipes to gluten free with 1 to 1 flour or some other gluten free substitute. Sometimes it works out! Other times it does not. This will be a breakdown of what I did and how it turned out. 
  • Cold Calls – when my dad suggested I start this blog, this is what he thought was most important. Basically this means calling restaurants/bakeries/cafes/coffee shops etc and asking them about their gluten free options and then just writing it all down and posting it all.

In conclusion, these blog posts are for everybody and nobody. Anybody that finds them useful is welcome to them and if nobody ever reads a single one, no big deal!

My secret hope: 

That somehow, some other gluten free gal or guy wondering what the pizza is *really* like at a place I have visited can stumble across my post and know.

I don’t know if people will read this, but, if you do, I’d love to hear from you! Share all your GF experiences with me from recipe tips and tricks to restaurant inside info!

Design a site like this with WordPress.com
Get started